Fun With Focus Stacking
23 09, 16 Filed in: Hardware | Helicon Focus | Macintosh Software | Digital Photography | Capture One
Fun with focus stacking using Helicon software - by David R Beebe
If you have a Canon or Nikon DSLR that supports Live View then read on. There is an amazing pair of applications from Helicon Software (heliconsoft.com) that performs focus stacking where a number of images are taken with different focal points and combined into a single image that is focused from the closest to the farthest points you want. There are a number of video tutorials on their website so I'll just outline the process I've worked out for myself. And so you know, while the software isn't that expensive for what it can do, there is a full featured free 30 day demo period. So, download Helicon Remote and Helicon Focus and give it a try. The software is available for both Mac and Windows.
Helicon Remote:
Step 1: Find a subject like flowers to try this on. You'll want something that requires more depth of field than you can get with your lens stopped down. You'll be capturing images with your lens wide open so you won't need to use a high ISO setting. If you are shooting outdoors, it will need to be a windless day as nothing can move from frame to frame.
Step 2: Put your Canon or Nikon DSLR (there is a list of supported cameras on their website) on a tripod, set it to Manual exposure and set your lens to AF. I always shoot in Raw format.
Step 3: Launch Helicon Remote from your laptop and connect your camera via its USB cable. Alternately, some cameras support a WiFi connection and you can use their smart phone app.
Step 4: In Helicon Remote, you will see what your camera sees on your laptop. Set aperture to wide open, set ISO low to reduce noise, set the shutter speed to whatever is needed for a proper exposure. Not only can you see the results on your laptop, there is a handy histogram on screen too. I have used an external LED light array that slips into the flash shoe to brighten the subject.
Step 5: In Helicon Remote, select the Auto Focus tool and click on the closest point you want to be in focus. Take a test photo and verify it is critically focused. If not, you can nudge the point closer or further as needed. Once it is where you want, lock that in as Point A. I like to select the Highlight Focused Area option which outlines sharp edges in blue. Canon cameras can also take advantage of the DoF Preview option.

Step 6: Now step focus outward using the single step, 3 step or 15 step buttons until you get the farthest point in focus. Again you can verify with a test photo and set it as Point B.
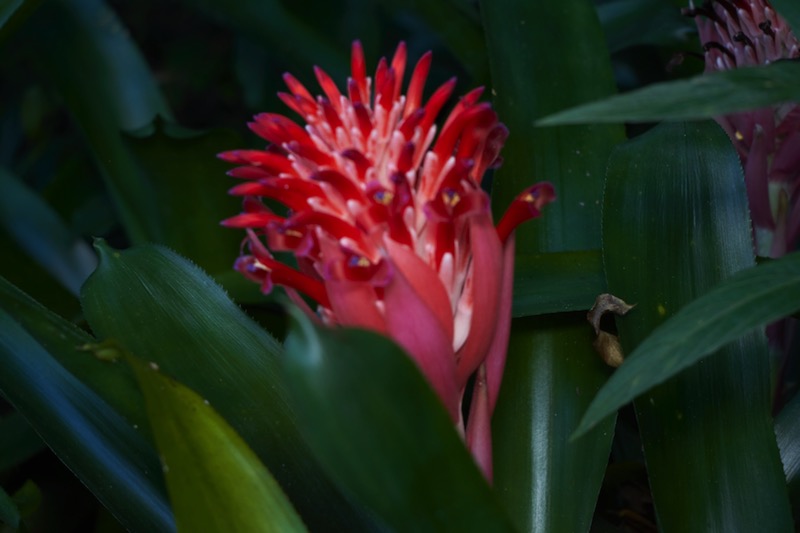
Step 7: Using their built in Depth of Field calculator, it will show you for the lens, distance and aperture selected the DoF. You want the focus interval to be less than this number. That insures that every part of the composite image was built from a frame where something was in focus. The focus interval will determine the number of shots needed. In this example, 13 shots were needed.
Step 8: Click the Start Shooting button. When complete, Helicon Remote will give you the option to send this stack of images directly to Helicon Focus for processing.
Helicon Focus:
Step 1: There are 3 different methods for focus stacking. I prefer the results from either Method B or C and I will do both to see which one generates the best image.
Step 2: If you shot Raw, you will be given options on what processing engine to use. More on that later. For now, pick one.
Step 3: Select Method B and I've gotten really good results with a Radius of 22 and Smoothing set to 4. Click on Render and watch the focus map being generated. This determines what part of each image is in focus and masks that image to only use those parts. Save the resulting image as TIFF.
Step 4: Select Method C and give that a try. Sometimes this gives me a better result than Method B does. Click on Render and save the resulting image as TIFF.
The Capture One detour:
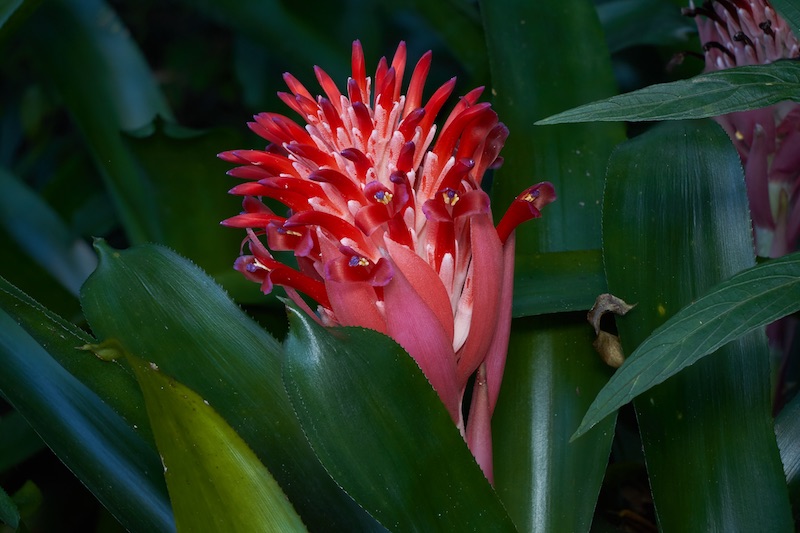
I've gotten even better results by importing the images from Helicon Remote into Capture One first and taking advantage of its superior Raw processing engine. I'll export the stack as TIFF and import them into Helicon Focus for processing.
Helicon Remote:
Step 1: Find a subject like flowers to try this on. You'll want something that requires more depth of field than you can get with your lens stopped down. You'll be capturing images with your lens wide open so you won't need to use a high ISO setting. If you are shooting outdoors, it will need to be a windless day as nothing can move from frame to frame.
Step 2: Put your Canon or Nikon DSLR (there is a list of supported cameras on their website) on a tripod, set it to Manual exposure and set your lens to AF. I always shoot in Raw format.
Step 3: Launch Helicon Remote from your laptop and connect your camera via its USB cable. Alternately, some cameras support a WiFi connection and you can use their smart phone app.
Step 4: In Helicon Remote, you will see what your camera sees on your laptop. Set aperture to wide open, set ISO low to reduce noise, set the shutter speed to whatever is needed for a proper exposure. Not only can you see the results on your laptop, there is a handy histogram on screen too. I have used an external LED light array that slips into the flash shoe to brighten the subject.
Step 5: In Helicon Remote, select the Auto Focus tool and click on the closest point you want to be in focus. Take a test photo and verify it is critically focused. If not, you can nudge the point closer or further as needed. Once it is where you want, lock that in as Point A. I like to select the Highlight Focused Area option which outlines sharp edges in blue. Canon cameras can also take advantage of the DoF Preview option.
Step 6: Now step focus outward using the single step, 3 step or 15 step buttons until you get the farthest point in focus. Again you can verify with a test photo and set it as Point B.
Step 7: Using their built in Depth of Field calculator, it will show you for the lens, distance and aperture selected the DoF. You want the focus interval to be less than this number. That insures that every part of the composite image was built from a frame where something was in focus. The focus interval will determine the number of shots needed. In this example, 13 shots were needed.
Step 8: Click the Start Shooting button. When complete, Helicon Remote will give you the option to send this stack of images directly to Helicon Focus for processing.
Helicon Focus:
Step 1: There are 3 different methods for focus stacking. I prefer the results from either Method B or C and I will do both to see which one generates the best image.
Step 2: If you shot Raw, you will be given options on what processing engine to use. More on that later. For now, pick one.
Step 3: Select Method B and I've gotten really good results with a Radius of 22 and Smoothing set to 4. Click on Render and watch the focus map being generated. This determines what part of each image is in focus and masks that image to only use those parts. Save the resulting image as TIFF.
Step 4: Select Method C and give that a try. Sometimes this gives me a better result than Method B does. Click on Render and save the resulting image as TIFF.
The Capture One detour:
I've gotten even better results by importing the images from Helicon Remote into Capture One first and taking advantage of its superior Raw processing engine. I'll export the stack as TIFF and import them into Helicon Focus for processing.